Category: Virtualization

Deploy a VDP appliance and Migrate VDR restore points

Looks like my new vSphere 5.1 cluster upgrade is coming along swimmingly. Time to get these VMs backed up and the old restore points accessible. Enters VDP

VDP is VMware’s newest VM backup and recovery solution that is supported for vSphere 5.1. As before, it’s integrated with vCenter and can be managed via the vSphere web client. It comes in 2 flavors and depending on the flavor, you get your choice of duplication store sizes, 1/2 Tb, 1TB and 2TB in the Basic version and many more choices in the Advanced version. Data is deduplicated across all backup jobs and utilizes change block tracking and VADP to lighten the load on your ESXi hosts and keeps that backup window much shorter, but only capturing the blocks that have changed. Works with both the Windows and Linux appliance vCenter.

Here are the steps I took to deploy my VDP appliance as well as migrate the restore points from VDR.

Scenario:

I had 1 VDR appliance that backed up both Windows and Linux VMs in 4.1, just with separate dedupe stores. To back up all windows VMs I configured a 900GB disks target and a 500GB disk for Linux.  Since one appliance can only contain 1 disk, I will deploy 2 appliances, (1) .5TB and (1) 1TB. Take a look at the VDP Admin guide for more details on how to size, configure, etc.

Prerequisite:

  • A disk presented to your esxi hosts that are of a large enough capacity to hold the dedupe store, OS, logs, checkpoints, etc. It must be formatted for VMFS-5.
  • Download the appliance from vmware’s website.

Deploy VDP appliance:

  • Launch vSphere web client. From Home, click on vCenter > Datacenter > Objects Tab > Actions Icon > Deploy OVF Template
  • Browse to the downloaded OVA appliance file and click next.
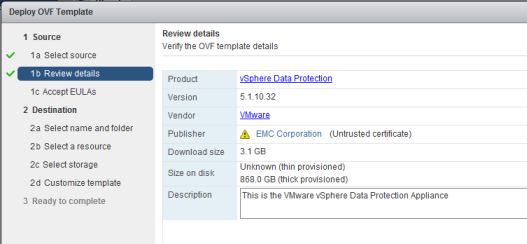
  • Review the details and click next.
  • Accept the EULA and click next.
Review Deploy Details
  • Enter the name of the appliance and select a folder or datacenter in which to deploy it to.
  • Select a resource where to run  the template and click next.
  • Select a datastore that has sufficient space then select a  virtual disk format. Thin Provisioned is best to begin with. You can convert to thick once the VM is deployed, otherwise  the deploy may fail. Click next.
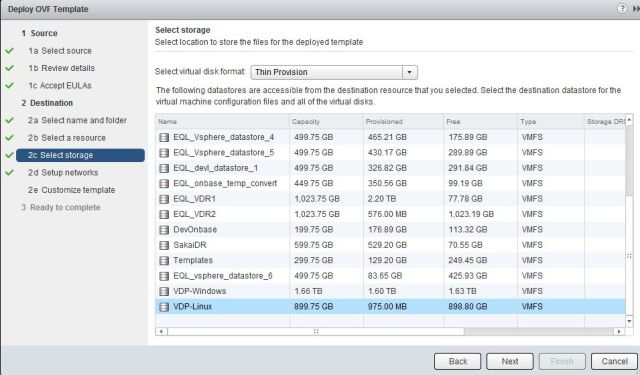
Select Datastore and disk format
  • Select the network the appliance will run on and click next.
  • Enter the IP and DNS information and click next.
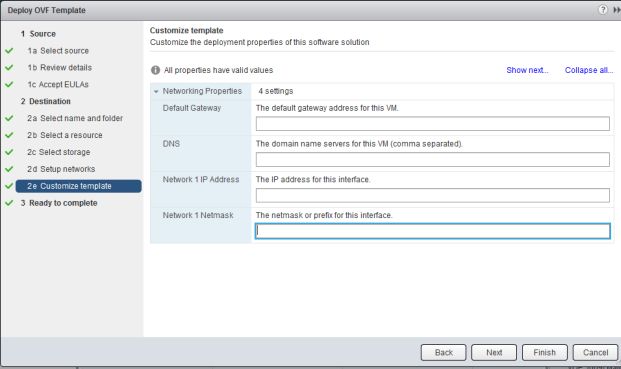
IP and DNS  values
Enter IP and DNS info
  • Review the details, click the check box next to power on and click finish.
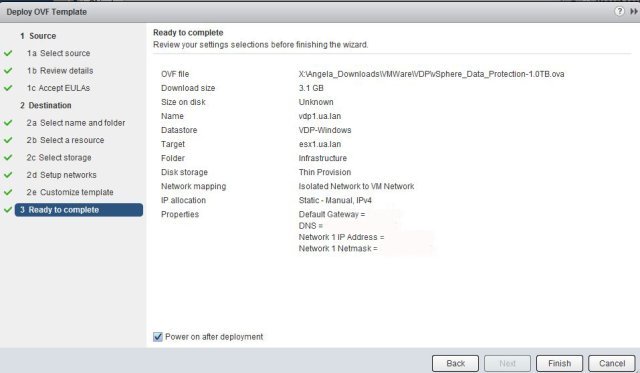
review template settings
Review your settings
  • To check the status of the deploy, review recent tasks. When the template is powered up, point your supported browser to https://IP_OR_Hostname:8543/vdp-configure
  • Log in with username: root password:changeme
Login to configure
Log in to configure VDP
  • On the welcome screen, click next.
  • Confirm the network settings are correct and click next.
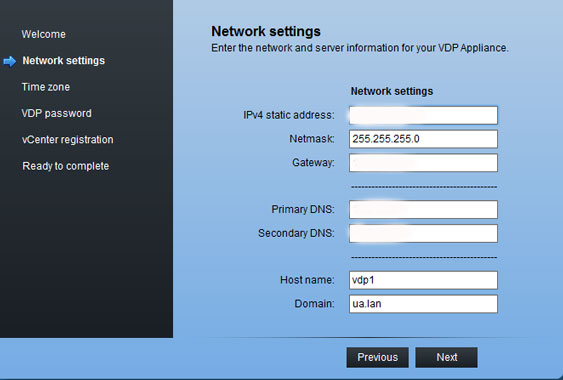
Confirm or edit network settings
Confirm or edit network settings.
  • Select your timezone, click next.
  • Enter your new root password. It must follow all of the listed criteria and cannot be more than 9 characters, 9 exactly! (so weird) Click next.
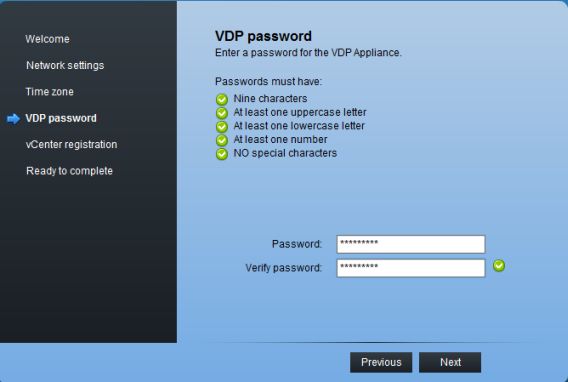
Enter your new root password for VDP
  • Enter your vCenter information:
    • vCenter service account username
    • Password
    • FQDN or IP
    • If you’re running vCenter on a non-default port, change it here.
    • Check the box next to use vCenter for SSO authentication.
    • Click test connection, if successful, click ok then finish.
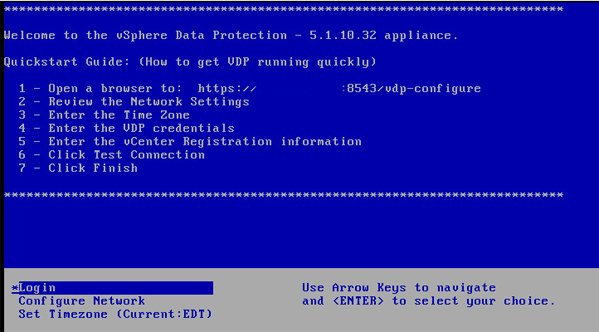
  •  Click Restart Now to reboot the appliance. The restart may take ~30 minutes. Monitor it’s progress from the console and when the blue “Welcome” screen is up you can proceed. Be warned, you may be back in ‘install mode’ instead of ‘maintenance mode’ after the appliance come back online. I thought it was me, but there are people out there that had to go through process more than once.  If you’re back at the configuration wizard, just humor it and answer all the questions again.

vdp-welcome

View the Maintenance Interface

  • Launch the appliance. Once configured, it’s now on it’s maintenance interface. Point your browser to https://VDPIP_or_Hostname:8543/vdp-configure/
  • When the system health check completes, view the status of the appliance. From page 24 of the VDP admin guide explains what the maintenance interface is used for.
    • “Viewing Status”—Allows you to see the services currently running (or currently stopped) on the VDP Appliance.
    • “Starting and Stopping Services” —Allows you to start and stop selected services onthe VDP Appliance.
    • “Collecting Logs”—Allows you to download current logs from the VDP Appliance.
    • “Changing vSphere Data Protection Configuration ”—Allows you to view or change network settings, configure vCenter Registration, or to view or edit system settings (timezone information and vSphere Data Protection credentials).
    • Rolling Back an Appliance” —Allows you to restore the VDP Appliance to an earlier known and valid state.
    • “Upgrading the vSphere Data Protection Appliance” —Allows you to upgrade ISO images on your vSphere Data Protection Appliance.
  • *Note* Maintenance services will be stopped for the first 24-48 hours after deployment. This is so your 1st backup window is uninterrupted by maintenance activities.

Migrate Restore Points

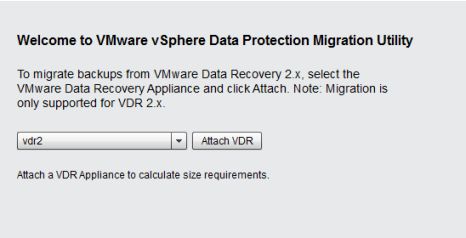
  • Point browser to https://VDPIP_or_HOSTNAME:8543/vdp-migration and log in with your VDP root password.
  • Click Attach VDR. This takes some time and will depend on the size of your backup set size.

attach-vdr

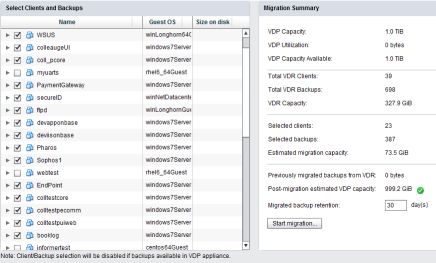
You can select the jobs you like to keep and edit the retention. This takes a very long time so be patient.

migrate

VMware KB on migrating restore points

Keeping VDR around for restores

Officially, VDR is not supported in 5.1, however, if you have the plug-in for VDR in vCenter, you can do restores. It’s best to do a restore rehearsal and never overwrite the existing VM. It’s recommended to keep VDR and VDP on separate hosts and to keep VDR powered off until you need to do a restore. If you’re using DRS, just create a rule that will separate virtual machines. This way, they won’t wind up on the same host by mistake.
Grow (Extend) an LVM on a Linux VM

We’ve all been there, you’re running an app on a VM and you see that it is quickly running out of free space. Since we’re not constrained by any physical limitation, we can just allocate more space to the guest and grow the disk.

As with any hard drive partitioning, make sure you back up any critical data. Since this is a vm and I’m running VDR, I can run a quick backup and begin. Also, remove any snapshots if you have them.

Power down the VM. Add space to the hard disk under Edit Settings.

Edit Settings on the VM

Power the VM back up  and  run a  # df -Th  to see the current disk usage & filesystem type.

df -h output before growing the disk

Run  # ls -al /dev/sda* to view all the disks

fdisk /dev/sda

:n (new disk)

:p (create primary partition)

:3 (the partition number)

: first cylinder  (keep the defaults)

: p (print the partition table and review the new partition on /dev/sda#)

:w (write the table to disk and exit)

# reboot the server or run  # partprobe . If partprobe throws an error, just reboot. This is to make sure the partition table is actually written.

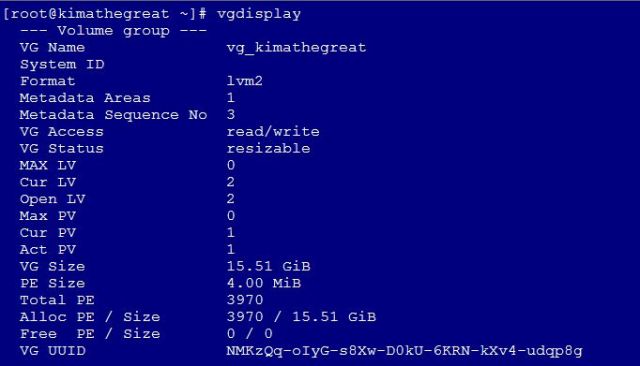
Run  # vgdisplay to view the volume group. In the FREE PE / Size section, you will see that there isn’t any free space yet. Take note of the proper name of the volume group.

Output from vgdisplay

Run a  #vgextend vg_insertyourvghere /dev/sda#

Do another #vgdisplay to confirm the free space on the volume group.

freespace

It shows you there is now 4GB free space that can be added to the volume group.  Now we extend the logical volume into that free space

Do an #lvdisplay to get the proper name of the logical volume you’re going to extend.

Now, time to extend the logical volume group.

#  lvextend -L +4G /dev/vg_kimathegreat/lv_root

lvextend

I reduced the size slightly to avoid the error about  “Insufficient free space”.

Now to resize the file system. If this is a partition that can be unmounted, run a # umount before running resize2fs.

#resize2fs /dev/vg_kimathegreat/lv_root

Run df -h to see the new size of the partition and the increased free space.

newfreespace

Now, there are a few caveats I’ve run across. Mainly when running fdisk /dev/sda. I will allow me to make a partition, but depending on where the sectors start and end, I won’t be able to run a pvextend.

If that happens, run # cfdisk and see where the partitions are and if you have any free space. If you do, that is where you create your partition.  You can make your corrections, between both fdisk and cfdisk , by deleting the small partition and creating a new one with the larger chunk of free space.  Just be careful and don’t delete anything critical.

As you can see, I’m missing sda3. That was because the 1st fdisk /dev/sda created a partition using only a few megs of space. I didn’t note the sector count and created the primary partition in the smaller block of free space. I used fdisk  (d) to delete that partition and then created a new one.

missingsda3

Having VT enabled on your CPU isn’t all you need to run a nested ESXi enviroment in VMware workstation 9

I built an ESXi 4.1 test environment in workstation 9 to test and document an upgrade from vSphere 4.1U2 to 5.1U1a

Overview of ESXi enviroment

My test box is:

  • Dell PowerEdge 2900 with (2) dual core Intel Xeon 5160’s
  • 24GB RAM
  • iSCSI Lun attached to hold my VMDKs
  • 2008 R2 Enterprise SP1 with VMware workstation 9.0.2 (upgraded from 8.0.2)

I wanted to install some 64-bit VMs inside of my ESX servers and after some cursory reading and searching, I was under the impression that I could. The first thing was to make sure that CPU could handle a 64-bit OS (Intel® 64) VT (Intel® Virtualization Technology (VT-x) and XD (Execute Disable Bit). I went to the Intel site and looked up my processor. Looks like I was ready to go. (I missed the part about EPT=No at the bottom  as Mike would say, “RTFM”)

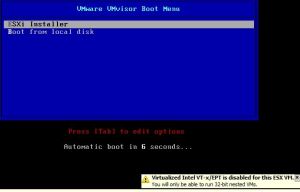
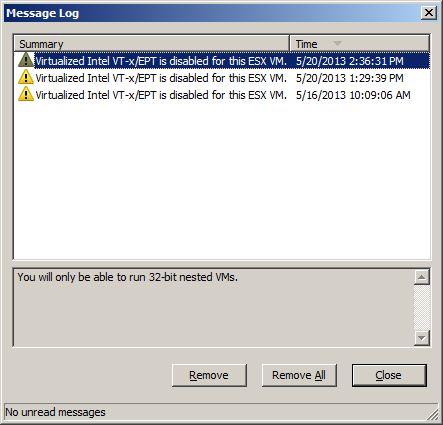
After installing the DC,SQL, vCenter server and making sure communication between the 3 was working, I created my 1 ESXi VM and when I powered it on I got this warning:

Intel VT-X/EPT is disabled for this ESX VM

vt-xept_disabled

There is a setting on the VM under processors that should be enabled. I checked the box, proceeded with my installation.

esxinstall-eror-fixed
Edit the settings on the ESXi VM and enable VT

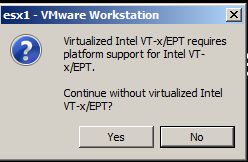
I configured the host, added it to the cluster. So I thought I was in the clear. Somewhere along the line, before I tried to install a guest, I saw this message.

Virtualized Intel VT-x/EPT alert
I clicked yes to continue. Clicking no wouldn’t let me proceed.

I searched this message and the previous one and found several posts that suggested  confirming the bios settings on the machine that’s running workstation, enabling VT in the settings (we did that) vmx or /etc/vmware/config hacks to fix it and nothing worked. I went so far as to update the bios on the server just in case there were some features that were not exposed on the version I was currently running.

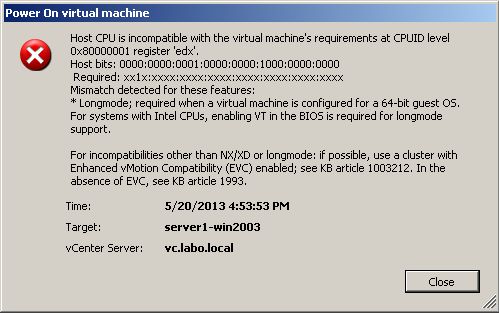
Here are several errors I got when I tried to install 2003 R2 64bit on the ESXi host:

buildingcluster-01

buildingcluster-error01
buildingcluster-error02

I posted on a vmware community for workstation and got a response that I really didn’t anticipate:

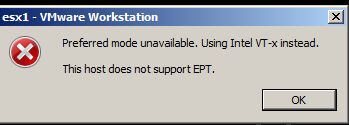
The implication of the message, “Virtualized Intel VT-x/EPT is not supported on this platform,” is that your host does not support EPT.

OK, so there is one more technology that is required to run a nested  64-bit environment. But what is EPT and when did it become so important?

The ability to run a nested environment is fairly new. The newer processors (AMD and Intel both) have begun to include Extended Page Tables (EPT) in to their procs (Nested page tables in AMD). EPT allows each guest VM to have it’s own page table to keep track of virtual & physical memory.

I have my nested environment running fine, there just aren’t any 64-bit VMs running on any of the ESXi 4.1 hosts.

For more info on EPT and Memory Management read here and here.

Social Share Buttons and Icons powered by Ultimatelysocial